top of page
Search
  • Writer: Jenni
    Jenni
  • Jul 31, 2019
  • 2 min read

The new Lawn Fawn Magic Picture Changer is a great element to use when trying to convey a before and after or surprise sentiment. I thought this idea paired nicely with the saying “April showers bring May flowers”, especially since spring is right around the corner.


ree

Going along with the spring theme, I chose Doodlebug’s Hello Sunshine paper pad. It’s also perfect because this is my first attempt at using only die cuts on a card, no stamping or coloring, so the cut-a-parts in the paper pad will work great!


For the first image shown on the card, I chose the cut-a-part with the rain clouds to symbolize April showers. Luckily, it fit the square opening of the die perfectly. I also chose the coordinating papers for the rest of the card from the paper pad and cut them out using the picture changer add-on and the A2 stitched rectangle stackable from Lawn Fawn.


ree

Watching Lawn Fawn’s videos on the picture changer, it seems that single layers work best, but I’m going to attempt some die cut inlays because I want the card to say “Hello Spring.” I chose the paper with flowers to represent the May Flowers part of the saying. I first started by tracing out the window from the die onto my patterned paper. Then I used the Thin Alphabet dies by Tim Holtz to spell out “Hello Spring” within the square opening. Once I got them all to fit, I die cut them once out of the patterned paper and then again out of some aqua cardstock. I inlaid the letters into the patterned paper with liquid glue, set some heavy books on top and let it dry completely.


ree

Once it was dry I die cut the paper with the letters using the other part of the picture changer die, making sure to go back in forth a couple times through the die cutter. I assembled the picture changer and used A LOT of powder from the anti-static tool. I really made sure to get every nook and cranny. I repeatedly tested out the mechanism before I attached it to the card and it seemed to work pretty well.


I layered everything onto the main panel and popped up the picture changer with some foam tape. For embellishments I added a few clouds and a butterfly from Lawn Fawn and a flower from W plus 9.


ree

So Hello Spring and bring on the flowers!


Thanks for stopping by!

-Jenni


  • Writer: Jenni
    Jenni
  • Jul 31, 2019
  • 1 min read

Yay! Here I am again, the same couple as before has asked me to do their invitations as well, so exciting!


ree

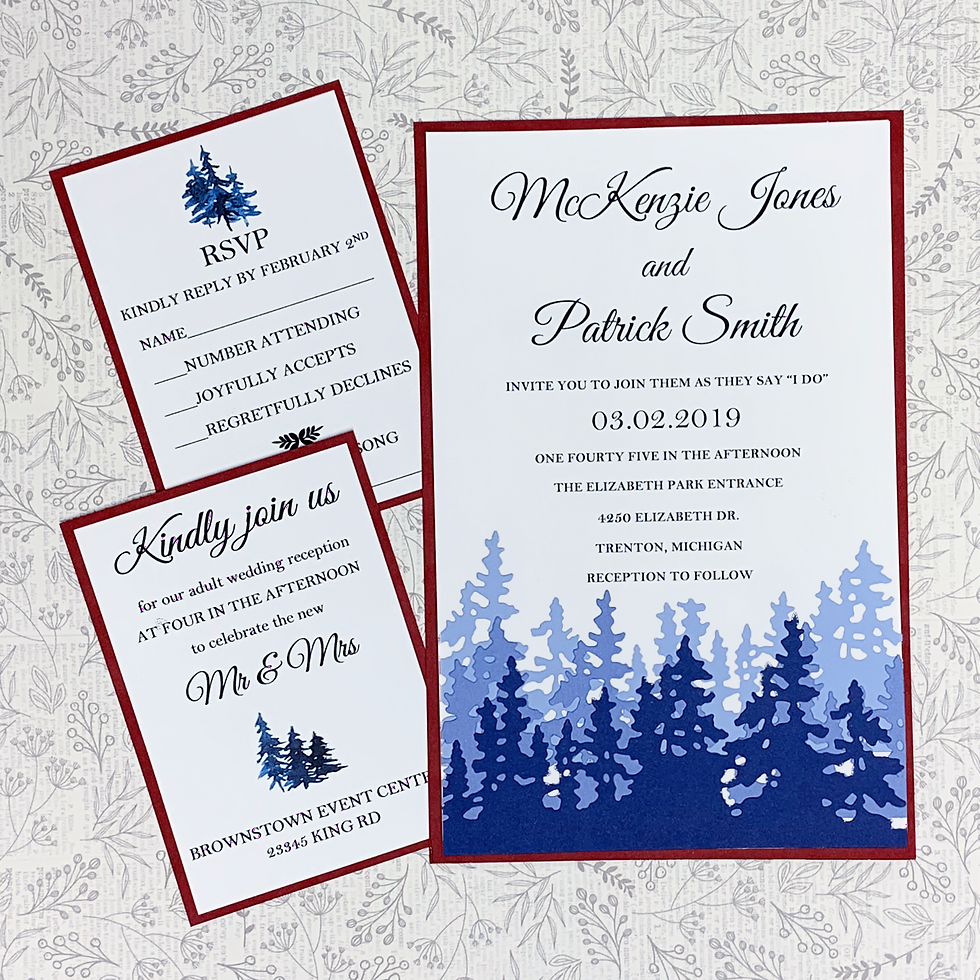
Sticking to the same criteria as before, I made a wintery invitation that incorporated their colors and theme, with the coordinating RSVP and reception cards.


I first printed out the information onto heavy white cardstock. I added snowflakes from Lawn Fawn’s Deck the Halls onto to main invite with Versamark ink, heat embossing them with a pearl white embossing powder.


Using the Woodlands die by Tim Holtz, I cut out trees in three shades of blue, starting with navy and getting progressively lighter. I layered and arranged them at the bottom of the invitation.


ree

Once everything was printed and assembled, it was matted onto maroon cardstock leaving an 1/8" border.


ree


ree

Thanks for stopping by!

-Jenni


  • Writer: Jenni
    Jenni
  • Jul 31, 2019
  • 1 min read

This design came about when I was asked to create Save the Dates for a classmate of mine from high school. It was so exciting to be approached by someone outside of your family who enjoys what you do, especially enough to trust you with something as important as their wedding.


ree

Their wedding took place during winter, with the colors being navy, maroon, and pink, along with birch trees as part of the décor. I took these elements and did my best to incorporate them into the design. :)


The background was made up of a birch tree die cut, cut from 65 lb. white cardstock.


ree

I then used Doodlebug glitter cardstock in the color navy, cut to an A2 size using a stitched rectangle die.


ree

I printed off my label design onto cardstock, and then used my Scan ‘N Cut to achieve the ornate shape.


The banners where cut out of navy cardstock using Lawn Fawn’s Fancy Folded Banners. The words “Save the Date” were stamped with an alphabet stamp set from Sweet Stamp Shop and heat embossed with white detail embossing powder.


Everything was then assembled with many, many bottles of Ranger Multi Media Matte glue and a fine point applicator, I tried my best not to get glue all over the trees.


ree

These glittery, winter save the dates were so fun to put together and I was so happy the couple was just as excited to see them!


Thanks for stopping by!

-Jenni


Follow Me
  • Black Twitter Icon
  • Black Facebook Icon
  • Black Instagram Icon
  • Black Pinterest Icon
  • Black YouTube Icon
Meet Jenni
I Love bright colors, cute critters and creating fun handmade projects.

© 2023 by DO IT YOURSELF. Proudly created with Wix.com

bottom of page