top of page
Search
  • Writer: Jenni
    Jenni
  • Jan 13, 2020
  • 2 min read

ree

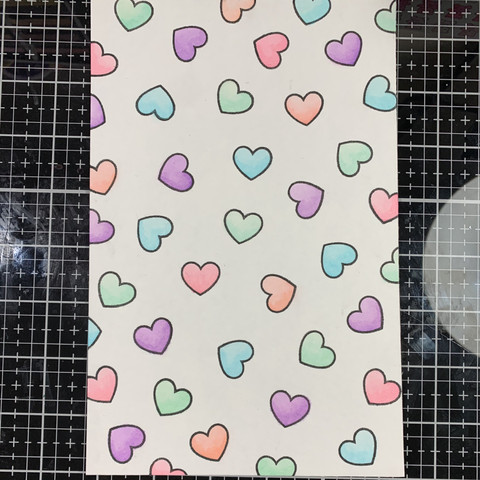
These pastel Valentine's came about after I had finished playing around with a heart background. I stamped out a bunch of hearts from Lawn Fawn's How you bean conversation heart add on, onto a piece of Strathmore watercolor paper. Because I hadn't used my Zig markers in awhile, I thought it would be good practice.


Once I had finished, I realized I had a nice background for two cards, so I cut it in half and looked through my stamps.

I though the Lawn Fawn bunny from Eggstra Amazing Easter was perfect for holding a candy heart and the little sitting bunny from Butterfly Kisses looked so cute next to him.


So once I picked the stamps, I stamped them onto some more Strathmore watercolor paper with Gina K. amalgam black ink. Then I colored them up with Zig real brush markers as well.

When I finished coloring, I used my Scan 'N Cut to cut out the images and went along the edges with a Memento tuxedo black marker. I also used a Spectrum Noir sparkle pen to add some glitter to the hearts.


I used coordinating cardstock colors from my stash to cut out A2 sized panels and stitched hearts.


For the sentiments, I used "Happy Valentine's Day" from the heart add and "To Some Bunny Special" from the Easter set. I used a Lawn Fawn banner die to cut out two curved banners from black cardstock, and heat embossed the sentiments with white detail embossing powder.


Then, I layered everything together and glued it down with Tombow mono liquid adhesive. Before adding the main panel to the card base, I wrapped some black and white jute around the top of the panel and tied a bow.


The final step was gluing the panels to a 110 lb. white card stock base.

ree

Thanks so much for stopping by!


-Jenni :)


  • Writer: Jenni
    Jenni
  • Jan 2, 2020
  • 2 min read

ree


Hello! Happy 2020!!


This year I am really working towards building my YouTube channel, so I'm so looking forward to getting this crafty ball rolling. :)


I thought this magical card would be perfect start to a New Year celebration! I recently took advantage of my Black Friday purchases and used a bunch of my Trinity stamps and dies; this included Magical Wizards stamps, Magical Sentiments stamps, and the Castle scene builder dies.


I was also able to use up some of my additional colored images from the 30 day coloring challenge, slowly but surely.


ree

To start this card, I ink blended some distress oxides in the colors antique linen, scattered straw, dried marigold, and seedless preserves onto a piece of Canson watercolor paper, which I cut down to 8.5"x3.5".


For the darkest color, I used regular distress ink in the color chipped sapphire.


Once I had the background complete, I used the castle die and Lawn Fawn's Forest border die, to create a silhouette in the distance out of black cardstock.


I also used Lawn Fawn's grassy hillside dies to create two sections of grass in slightly different green colors. I added dimension by blending on mowed lawn, lucky clover, pine needles, and black soot distress oxides in various amounts across each grass piece.


I glued down and trimmed the additional pieces to fit the slimline panel.


From there, I moved on to the fireworks. I used the stamp in the wizards set that looked like shine marks for the tip of a wand and stamped it twice in the same spot but rotated it slightly to create a firework.


I first stamped the images onto some scrap paper with black ink and fussy cut them out in order to see where I wanted to place them, then I stamped onto the main card panel with Versamark ink.


I used gold detail embossing powder and melted it with my heat gun. I then used a Ranger Emboss It pen to add additional details to the fireworks and added more embossing powder.


For the sentiment, I pieced together "Have A WandERFUL New Year" from the sentiment set and heat embossed that with gold embossing powder as well.


To finish the card, I glued down the wizard images and layered the main panel onto coral and black cardstock panels, and finally onto a 9"x4" 110 lb. cardstock base.

ree
ree

Thanks for stopping by!


Wishing everyone a WandERFUL 2020!!


-Jenni :)


  • Writer: Jenni
    Jenni
  • Dec 17, 2019
  • 2 min read

ree

Hello!


This Christmas scene card is made up of Santa and Mrs. Claus exchanging gifts in front of the fire; which just goes to show that they are more prepared for the holiday than I am...only 8 DAYS away! HaHa!


To start, I used up some more of my precolored images from the Daily Marker 30 day coloring challenge. The images were from the sets Ho-ho-holidays, Home for the Holidays, and Christmas Dreams from Lawn Fawn.


I stamped out a Christmas tree, a fireplace, and some additional presents from Christmas Dreams onto some Neenah 80 lb. card stock. I then colored them in with copic markers to match the rest of the images.

ree

At the very end, I also ended up stamping out and coloring these three stockings to balance out the scene.


After the coloring was complete, I added white highlights using a Gelly Roll pen and cut everything out with my Scan 'N Cut. For a final touch, I added some sparkle and shine with a Spectrum Noir Sparkle pen. ✨


I used a DCWV paper pad called Very Merry to put together the rest of the scene. I used a piece of wood grain patterned paper for the floor and a polka dot paper for the walls. I also used another piece of polka dot paper to create a frame.


I cut out an A2 sized panel from 110 lb. black cardstock and trimmed down the patterned papers, leaving an 1/8" border, to create the room. I also used a cream colored card stock to create a 1/4" strip for the trim.


I used the scalloped rectangle frames from Craftin Desert Divas, which I was lucky enough to pick up from the shop before it sadly closed, to cut out the frame. I added a single layer of foam tape to the back for a little added dimension.


The fancy folded banner die from Lawn Fawn and some green Recollections card stock, made up the banner on which I stamped the sentiment. I used the "Season's Greetings" stamp from the Home for the Holidays stamp set and heat embossed it with white detail embossing powder.


I then started to glue everything down with Tombow mono liquid adhesive. Once, everything was in place, I took the sentiment banner and popped it up in the corner of the scene with some foam tape.


ree

At this point, the scene was finished, but this is where I thought it needed something on the sides of the fireplace and so I added the additional stocking images to either side.


Before attaching the main panel to the card base, I stamped the sentiment "May all your holiday dreams come true" in Gina K. amalgam black ink and heat embossed it with clear embossing powder.


For the final step, I added the main panel to the base using liquid adhesive.


ree

Thank you so much for stopping by!


I hope you have a wonderful holiday. :)


-Jenni


Follow Me
  • Black Twitter Icon
  • Black Facebook Icon
  • Black Instagram Icon
  • Black Pinterest Icon
  • Black YouTube Icon
Meet Jenni
I Love bright colors, cute critters and creating fun handmade projects.

© 2023 by DO IT YOURSELF. Proudly created with Wix.com

bottom of page