top of page
Search
  • Writer: Jenni
    Jenni
  • Feb 2, 2020
  • 2 min read

ree

Hedgehogs are so adorable and so is this Lawn Fawn stamp set made up of these two little sweeties. Sending Hedgehugs was one of my first stamp sets and is still one of my favorites, so I thought these cute images would be a good focal point for a clean and simple Valentine.

To start, I stamped the images onto Neenah 80 lb. card stock with Gina K. amalgam ink and colored them using Copic markers. Then I cut the images out using my Scan ‘N Cut.

For the main panel, I used a piece of patterned paper from a 6x6 Pebbles paper pad called Forever My Always. I used white streamers from the dollar store to make a crepe paper rosette and layered a pink stitched scalloped circle on top of that.


Before attaching the rosette to the card front, I added some pink baker’s twine and secured it in the back with some washi. I used a little hot glue to attach the rosette and then used some Tombow liquid glue to add the images on top of that.

I used a sentiment from Lawn Fawn’s You’re Just My Type and stamped it onto a piece of dark pink card stock. I heat embossed the words with white detail embossing powder from Recollections. Then I took the largest Lawn Fawn Everyday Sentiment banner and cut out the sentiment vertically.


I then used a scrap of white card stock to mat the sentiment banner and attached it towards the upper left corner of the card front.

I used liquid glue to attach the card front to an A2 110 lb. white card base.

To finish, I used Liquid Pearls to add a little extra shine and dimension to card.

ree

Thank you so much for stopping by!


—Jenni :)


  • Writer: Jenni
    Jenni
  • Jan 23, 2020
  • 2 min read

ree

Hi there!


Today I am doing a project share from a swap I recently participated in on Instagram. It was hosted by two awesome crafty ladies @discodolly456 and @craftymomoftwo; you can check out all the wintery goodness at #snowangelswinterlandswap2019.


ree

I was so excited to be part of this swap because I haven't done much paper crafting outside of card making and it was fun trying out all these new projects.


I'd say I have a mostly clean and simple style, but I absolutely love layers, rosettes, and dimensional embellishments, however, when it comes to creating, I sometimes get overwhelmed with all the options, so I stick to what I know.


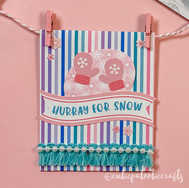
But being part of this swap required making an acetate embellishment folder (Michelle's Little Creations), an ornament, tassels, a mini banner, and teabag sequin mixes (Septeria18). It was the perfect reason to try something new, including using a sewing machine!

The theme was winter wonderland and for that I used Doodlebug's Winter Wonderland collection, along with some additional Doodle pops.


I used streamers from Hobby Lobby to create my very first crepe paper rosettes, which I used to make my first paper wand and other embellishments.


For the tassels, I used various ribbons and charms that I have collected from Micheals, Dollar Tree, and Hobby Lobby.


The bows are made up of tulle and Doodlebug brads and the glittery flowers are made from glitter card stock and Tim Holtz's Tattered Florals dies.


For the mini banner, I made 2"x3" envelopes and used mini clothespins to clip them onto a piece of baker's twine, which I knotted on each end to make two loops.


I think my makes turned out pretty cute, but I was absolutely blown away when I received my happy mail from Andrea, @craftymomoftwo.

ree

Everything was absolutely gorgeous! I'm so inspired! 🎀🌸💕❄ I definitely can't wait to be part of another swap. 😊

Thanks so much for stopping by!


-Jenni :)


  • Writer: Jenni
    Jenni
  • Jan 13, 2020
  • 2 min read

ree

GNOMES!! I don't know when or if this trend will end, but gnomes will always be in my heart (and on my shelves)! :) So even though this Sugar Pea Designs set was made for Christmas, I turned these little cuties into Valentines.

I started by stamping out two of the gnome images from the stamp set, Gnome for Christmas, onto 80 lb. Neenah cardstock. I used Gina K. black amalgam ink and stamped the images a couple times to get a crisp image.


I also added a heart to the sitting gnome by masking off his hands and stamping the heart image from Lawn Fawn's Milk and Cookies stamp set.


I used mostly pink and red copic combinations to color in the gnomes. For highlights and touch ups, I used a Uniball white Signo gel pen. Once I finished coloring, I cut them out using my Scan 'N Cut.


From there, I flipped through the Vintage Valentine paper pad from The Paper Studio, to find the patterned papers that coordinated best with the images.


Once I had my patterned paper picked, I used Lawn Fawn's stitched rectangle stackables to cut out an A2 panel for the first card. I also cut out a black banner with Lawn Fawn's everyday sentiment banner dies. And for a final element, I used a scalloped stitched heart die from my stash to cut out a maroon colored heart.


Before gluing the card together, I used Lawn Fawn's Oh Gnome stamp set for the sentiment "there's GNOME one like you," and heat embossed it with white detail embossing powder.


I assembled and glued the card together and attached it to a 110 lb. white cardstock base.


For a final touch, I added some white liquid pearls to the card panel as well.

ree

The second card was assembled pretty much the same, except I used Waffleflower's A2 layer dies in order to add a kraft cardstock layer under the patterned paper.


For the sentiment, I used the same Lawn Fawn set, but just trimmed it out instead of using a banner die.


Then I glued everything together with some Tombow mono liquid adhesive and added a bow to the top of the card using some dollar store jute twine.


For the final step, I added the main panel to another 110 lb. white card base.

ree

Thanks so much for stopping by!


-Jenni :)


Follow Me
  • Black Twitter Icon
  • Black Facebook Icon
  • Black Instagram Icon
  • Black Pinterest Icon
  • Black YouTube Icon
Meet Jenni
I Love bright colors, cute critters and creating fun handmade projects.

© 2023 by DO IT YOURSELF. Proudly created with Wix.com

bottom of page