top of page
Search
  • Writer: Jenni
    Jenni
  • Mar 20, 2020
  • 2 min read

ree

Hello!


I have wanted to make a card with this Sassy Club stamp set since the day I got it; and it just so happens that my brother in law is a huge fan of this little green guy! So I thought his birthday would be the perfect occasion to put this set to use.


Knowing his birthday was coming quick, I colored up the main images with Copic markers during the Daily Marker 30 day coloring challenge.


I used the karolina patterned paper from Lawn Fawn's 6x6 Spring Fling paper pad, cut down to 5 1/4" x 4" for the background. I then layered that onto an A2 sized black card stock panel.


With a stitched hillside border from Lawn Fawn, I die cut a border piece from some 110 lb. white Neenah card stock. I blended on some vintage photo distress oxide ink with a foam blending tool and trimmed the whole piece down to 4" wide.


I added the boarder piece to the spring fling panel and adhered the colored characters on top of that.


For the sentiment, I used a Tim Holtz alphanumeric thinlits die set to cut out the letters making up the "Your Birthday, it is!" phrase.


To keep the words as straight as I could, I lined them all up against a straight edge and picked them up with washi tape. Then I flipped it over and used a Zig glue pen to dot adhesive onto the letters. I laid it onto the main panel and after a few seconds, removed the washi tape.


I attached the whole thing to a 110 lb. white card base and added an extra little green guy on the inside of the card.


This was a relatively quick card to make, but with the characters taking center stage, I think its a great card for anyone who loves that little green alien!


Thanks so much for stopping by!


-Jenni :)


Supplies

Paper:


Stamps:


Dies:


  • Writer: Jenni
    Jenni
  • Mar 17, 2020
  • 4 min read

ree

Happy St. Patrick's Day! 🍀


*I'm posting my project a couple days early, so that you can take advantage of an awesome discount I've listed below!*


This past weekend in the Thoughtfully Facebook group, I participated in an online crop. I crafted with several freebies (links available under the BLOG tab) and the Lucky Tessa paper collection from Thoughtful Studio.


Initially I hadn't really planned on making anything specific. I just laid everything out and started playing around. By the end of the crop, I was still going and ended up with a whole set of cards and a shaker tag!


These cards came together with only a few embellishments and a single stamp set. I used the Christmas Gnomes stamp set from Sugar Pea designs and turned them into little leprechauns. For four of the characters, I stamped out the images onto Neenah 80 lb. card stock with Gina K. black amalgam ink and then colored them in using Copic markers.


Once they were all colored, I fussy cut them out and went around the edges with a Memento tuxedo black marker.


I colored the fifth leprechaun's face and beard with Copics, but then paper pieced the rest of him using paper from the Lucky Tessa collection. I also left a white border when I fussy cut him out.


In putting together the rest of the cards, I mostly used the Say What? Gift Tags die from Lawn Fawn, some green and white baker's twine, and gold washi tape. I also used a clover svg which was part of the 4th freebie that was released in the FB group on the day of the crop.


I used my Cricut to cut out nine clovers from an A2 panel of Lucky Tessa paper. I removed the clovers and used the piece that was left behind to make a shaker card.


I added acetate to the back with double sided tape and popped it up using foam tape. I made a mix of green and gold sequins and seed beads, and added it onto a second piece of patterned paper. Then I attached the clover window piece on top of the sequin mix.


For the main embellishment, I cut out a small circle and a slightly larger scalloped circle with my Cricut. I used a foam blending tool to add vintage photo distress oxide ink around the edges of the circle. Then, I took one of the colored leprechauns and added a clover to his hand. I layered everything together and added thin gold washi in two strips across the front.


For the next card, I printed out some of the 4"x6" freebies and used a stitched rectangle die to cut down the "lucky charms" panel to 3.5"x5.5". I added a bow using gold elastic and layered it onto two other card stock panels with foam tape.

ree

The next two cards were made using cut-a-parts from the freebies, baker's twine, and the Lawn Fawn gift tag dies. For the "Thinking of You" sentiment, I used the Wavy Sayings stamp set and Everyday Banners die from Lawn Fawn, and vintage photo distress oxide.


I used tea themed papers from the Lucky Tessa collection for the layered panels and the tags. I distressed those as well, added everything to the card panel and topped it off with one of the leprechauns holding a cup of tea.


I used the cut-a-part that read "lucky" as the sentiment by adding "in love" with a white gel pen. I layered more of the patterned papers, another leprechaun, baker's twine, and some gold hearts. I made the gold hearts by die cutting the gold washi with the dies that came with the Lawn Fawn gift tag set.

ree

For the final card, I cut an A2 panel from a piece of patterned paper with a stitched rectangle die. I used my scraps to cut small strips of all the different patterns and added them to the card front. I used the paper pieced leprechaun and another cut-a-part and layered it onto a 2 1/4" kraft card stock square. Then I layered that onto the card front with foam tape.


The shaker tag pieces were cut using the Lawn Fawn die and assembled the same way as the shaker card shown above. I fussy cut a shamrock from the same patterned paper and glued it onto the last colored leprechaun image so it looked like he was holding it. Once the tag was all together, I added the colored image to the front and tied a piece of baker's twine through the top of the tag.


I added all the card panels to white card bases I made using 110 lb. Recollections card stock.

ree

These cards were so fun to create! Once I got going, they all seemed to come together so smoothly. I think there's just something about green that makes it really enjoyable to work with. I was also inspired by all the other amazing projects everyone created in the group. 💚

ree

I hope you have a wonderful St. Patrick's Day full of luck! ☘


And as always, you can find more creations from me and the rest of the Thoughtful Studio design team on Instagram and Facebook @thoughtfulstudio, as well as following the hashtags #madewiththoughtful and #thoughtfulstudioDT .


Thank you so much for stopping by!


-Jenni :)


Supplies

Stamp Sets:


Dies:


  • Writer: Jenni
    Jenni
  • Mar 6, 2020
  • 4 min read

Updated: Mar 7, 2020


ree


Hello,


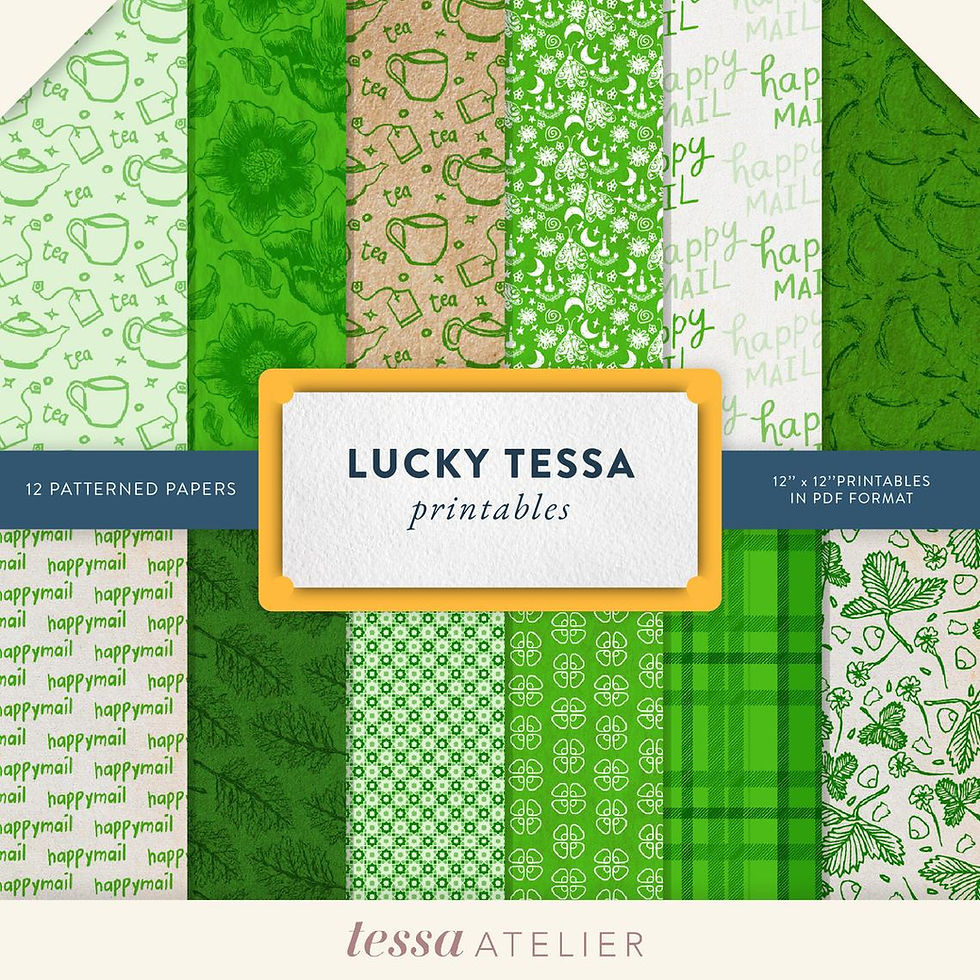
I am so excited to share my latest Thoughtful Studio design team project centered on the gorgeous Lucky Tessa paper collection.


Green is my favorite color. For me, it stirs up a lot of nice thoughts, feelings, and happy memories; one of those being the month of March. A month generally associated with the color, March brings the first day of spring, St. Patrick's day, and my birthday. All fun and exciting things that come to mind when I think of the color green. To me, it also incites feelings of peace, harmony, growth, energy, and being in nature. It can be a calming, yet lively color, so really the best of both worlds.


That being said, these papers are full of unique patterns in all kinds of rich and vibrant greens! So it wasn't hard to be completely inspired to make something fun.


ree

ree

Looking at this collection, the patterns are varied in a way that could suit a bunch of different projects; however, one of my first thoughts was an interactive Harry Potter themed card.


Slytherin was definitely my starting point, but looking through my stamps, I realized a Professor Sprout and Trelawny character would be the perfect complement to the plant and tea patterns in the collection. Funnily enough, I didn't really end up going with the Slytherin theme at all.


I used ten different stamp sets from The Sassy Club for all the images on this card, which I've listed below. During the last 30 day Daily Marker coloring challenge, I had colored up all the images.


Everything was stamped with Gina K. black amalgam ink onto 80 lb. Neenah card stock and colored with a mix of Copics, Spectrum Noirs, and Blick Studio brush markers.


Because my images were ready to go, I was all set to create the interactive card base and I chose to make an infinity card.


To start, I cut four 3" x 6" panels from 65 lb. black card stock. On the long side of each panel, I scored the card stock at 1 1/2" and 4 1/2". Then I turned the panel onto the shorter side and scored it down the middle at 1 1/2", but only until it met the other scoreline. I did this at both ends, which made the panel look like this:


ree

Once everything was scored, I lined up two of the panels in a landscape orientation and the other two in portrait orientation.


ree

I added liquid glue to the corners (shown in blue and green) and flipped the horizontal panel over onto the two vertical panels (matching the blue and green squares with their coordinating numbers).


Then I repeated that for the second horizontal panel.

ree

After the pieces were glued together, it created four card faces. I folded it in the following four positions and reinforced the score lines with a bone folder.


ree

Then I started to embellish each side of the infinity card with Lucky Tessa and my colored images. However, because of the way the card works, the fold lines are not the same on each face.


So I needed to cut my card stock into the following sizes:

  • 8 - 2 3/4" squares (green)

  • 4 - 2 3/4" x 1 1/4" rectangles (purple)

  • 16 - 1 1/4" squares (blue)


ree
Card stock layouts for each face, starting from the first side.

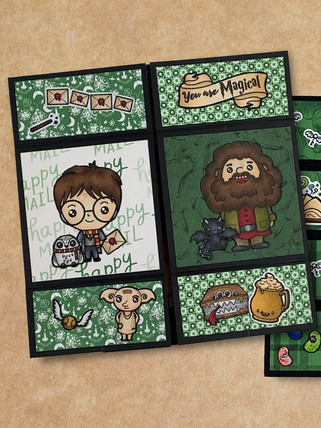
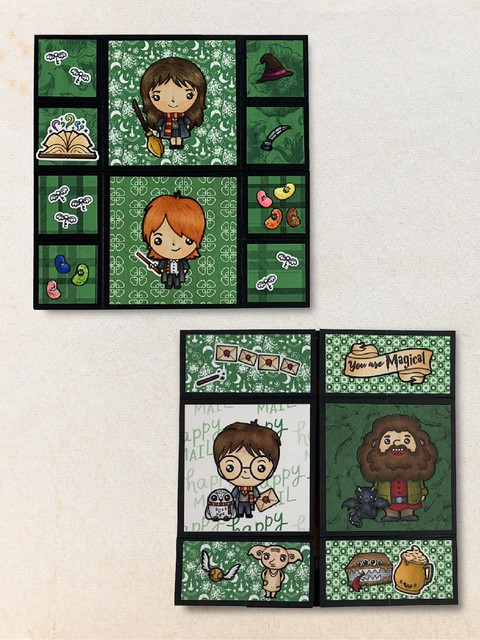
I spent a lot of time matching up the characters to the patterns and trying to use as many of them as I could. All of the images really popped against the green patterns!


I used liquid glue to attach everything so I had a little wiggle room to move the pieces around. For the most part I tried to keep the images within the patterned card stock pieces, but a few were just a little too big. It worked out though, as long as they didn't interfere with the folds of the card.


For the sentiment, I stamped "You are Magical" from the Wizard Pals stamp set onto a colored banner from Ghosty Friends with Gina K. black ink and added it to the front panel of the card.


Now I have an infinity card with some of my favorite things that I can't stop playing with! Haha!! 😂


ree

Before you go, I'd also like to let you know about an online crop in the Thoughtful Studio FB Group, Thoughtfully.


On Saturday, March 14th, I hope you can join us and craft along as we have some fun with the St. Patrick's day freebies that Marie, the owner of Thoughtful Studio, has created for the #luckytobethoughtful crop (a link to the freebies can be found under the BLOG tab of my website).


She is also currently offering a 30% off coupon in the Thoughtful Studio Etsy shop. You can use the code LUCKYTOBETHOUGHTFUL or follow the link below. 😄


ree

And as always, you can find more creations from me and the rest of the Thoughtful Studio design team on Instagram and Facebook @thoughtfulstudio, as well as following the hashtags #madewiththoughtful and #thoughtfulstudioDT .


You can also get these wonderful patterned papers here: https://www.etsy.com/shop/shopthoughtfulstudio?coupon=LUCKYTOBETHOUGHTFUL

*Above link includes a 30% discount code for a limited time, not applicable to Limited Edition item.


Thank you so much for stopping by!


-Jenni :)


Supplies

Stamp Sets:


Follow Me
  • Black Twitter Icon
  • Black Facebook Icon
  • Black Instagram Icon
  • Black Pinterest Icon
  • Black YouTube Icon
Meet Jenni
I Love bright colors, cute critters and creating fun handmade projects.

© 2023 by DO IT YOURSELF. Proudly created with Wix.com

bottom of page