top of page
Search
  • Writer: Jenni
    Jenni
  • Apr 6, 2020
  • 3 min read

Updated: Apr 8, 2020


ree

Hello!


I hope everyone is doing well and staying safe. ❤


Today I am sharing my latest design team project for Thoughtful Studio. I am using the super bright and colorful Tessa Wakes the World Up paper collection to create a fun 3D scene.


ree


Looking at this collection, the colors and floral textures inspired thoughts of spring and Easter. Blooming flowers, little chicks, chocolate bunnies, and bright yellow Peeps all ran through my head.


With that in mind, I thought the Tessa Wakes collection would be perfect for creating a little Easter shadowbox scene.


I first started this project by stamping out a bunch of images from Lawn Fawn's Eggstra Amazing Easter and Butterfly Kisses stamp sets onto a piece of Neenah 80 lb. card stock with Gina K. black amalgam ink.


I used Copic markers to color the images to match the color scheme of the paper collection. Then I used my Scan 'N Cut to cut out the images.


For the next step, I deconstructed a shaker frame from Dollar Tree that was filled with sequins. I took the back off of the frame and removed the ribbon and the sequins. Then I used an X-acto knife to scrape the word YUM off of the glass.


ree

I used the insert that came with the frame as a size guide for my main background piece of patterned card stock. For that, I chose the yellow pressed flower pattern to represent the sky.


Before I started to build my scene, I marked off an 1/8" on each side of the background to incorporate the edges of the scene that would be covered by the frame.


I used the Lawn Fawn Flower Border die to create the first layer, which I cut from a sheet of bright pink Recollections card stock. Then I used more of the Tessa Wakes papers to cut out the tops of the flowers for the border, and layered them on top.


For the next layer, I used a Stitched Hillside Border die that coordinated with the Flower Die, to cut out a hill from some light pink card stock. Before adding that to the scene, I covered the back with a layer of foam tape.


With another stitched border die, I cut another hill from a piece of light yellow card stock. Then I layered the back of that piece with two layers of foam tape.


I stacked the layers on top of each other and added my colored images. I also used a Spectrum Noir Sparkle Pen for some extra shine. I used a white gel pen to create highlights and add patterns to the colored egg images as well.


I placed my scene inside the frame and closed up the back. Then I used some coordinating ribbon, which I also found at the Dollar Tree, to replace the one that was originally there.


And that completes this cute little Easter bunny scene! 😄


I think the Tessa Wakes the World Up paper collection was the perfect jump start into spring. The patterns are textured, yet whimsical, and go so well with my little bunny scene.

ree


ree


ree

You can find more creations from me and the rest of the Thoughtful Studio design team on Instagram and Facebook @thoughtfulstudio, as well as following the hashtags #madewiththoughtful and #thoughtfulstudioDT .


And of course, you can get these wonderful patterned papers here: https://www.etsy.com/shop/shopthoughtfulstudio?coupon=THOUGHTFULSTUDIODT

*Above link includes a 15% discount code, not applicable to Limited Edition item.


Thank you so much for stopping by!


-Jenni :)


Supplies


Stamps:


Dies:


  • Writer: Jenni
    Jenni
  • Apr 5, 2020
  • 3 min read

ree

Hello!


I hope everyone is safe and able to make the most of their time at home during this uncertain time.


Today I am excited to share my first official DT project for My Inkie Fingers. The current challenge is #MIFC011, which is all about dimension. I wanted to make something fun, bright, and colorful.


ree

Recently, many awesome companies have been releasing free digi stamps, (which you can find here) and I thought it would be fun to try some digital coloring. For this card, I colored up the Spring Bloom digi set from The Sassy Club as part of The Daily Marker 30 day.


Because the set is all about spring, I thought of soft Easter-y pastels and bright flowers when coloring in the images. Once they were all colored, I printed them out onto 80 lb. white Neenah card stock and fussy cut them.


From there, I used the A2 Grid Panel Die and the A2 layers dies from Waffle Flower to cut out the main panel piece for the card front. I used the grid die with a piece of pink polka dot card stock from my stash. After running it through my die cut machine, the die also embossed an 1/8" frame around the edge, which I cut apart using the A2 layers die.

For the dimension, I doubled up some Scotch 3m foam tape, cut it into thin strips, and added it across the back of the entire grid piece. Then I made a card base from 110 lb. white card stock and glued down the 1/8" frame with liquid glue.


Before I added the grid, I glued down a piece of minty/aqua colored patterned card stock within the pink frame. I removed the release paper from the foam tape and laid down the grid onto the card front. I did it lightly so that I could still move it around or stick some images underneath.


I laid out all the images across the front of the card to determine their placement. Then I glued some directly onto the card base and popped up others level with the grid.


In some of the spaces that seemed a little empty, I used a tiny die from Lawn Fawn's Mushroom House, to fill them in with little butterflies. I folded the butterflies in half instead of leaving them flat, and glued them flush with the card front.


ree

ree

ree

I think this card provides a cute scene with all the elements of spring. I also think that the placement of the images and the varying dimension makes this card really fun to look at. I'd definitely say it “pops”! 😄


This was such a fun challenge and this card has me looking forward to nice weather and sunshine!

If you are interested in seeing more inspiration using Card Sketch #11, be sure to follow the hashtag #MIFC011 on social media and check out the My Inkie Fingers blog to see how you can participate in the current challenge.


My Inkie Fingers Blog Post:

The challenge winner has the opportunity to receive a prize as well as a feature on the My Inkie Finger’s winners’ blog post.


The current challenge prizes include Stampin’ Up’s The Gang’s all Meer stamp set and a 6x6 Golden Honey Designer Series Sampler Pack.


Prizes are currently only available to Canadian residents. However, anyone can play along and winners will still be featured on the blog. 😄

Be sure to check out the My Inkie Fingers blog for Challenge Information and Guidelines to see how to play along.


I can’t wait to see what you create! I hope you have a nice and safe week.


Thank you so much for stopping by,


-Jenni :)


Supplies


Dies:


Stamps:


  • Writer: Jenni
    Jenni
  • Mar 20, 2020
  • 1 min read

ree

Hi there!


This blog post is a showcase for an unexpected Guest Designer of Thoughtful Studio who needs some recognition...my MOM!! 😄


Over the weekend, I asked her if she would like to join in on the #luckytobethoughtful online crop with me, in the Thoughtfully FB group, and she did.


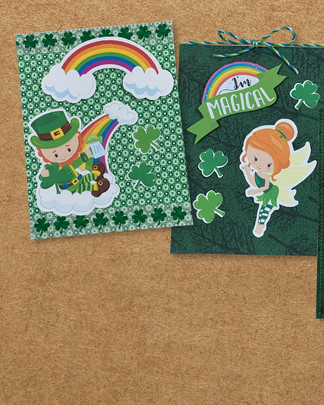
These are her adorable creations! She used the Lucky Tessa paper collection along with a bunch of cuties from Pretty Grafik and some Dollar Tree stickers.


After I shared her cards in the group, Marie (Thoughtful Studio creator) fell in love with them too and asked to share them.


If you'd like to show my momma some crafty love you can find her on Instagram @phyllisbranny or in the Thoughtfully FB group.


I love crafting with my mom and I'm sure you'll be seeing her again! 🤗💕


And as always, you can find more creations from me and the rest of the Thoughtful Studio design team on Instagram and Facebook @thoughtfulstudio, as well as following the hashtags #madewiththoughtful and #thoughtfulstudioDT .


You can also get these wonderful patterned papers by following this link:


*Above link includes a 15% discount code, not applicable to Limited Edition item.


Thanks so much for stopping by!


-Jenni :)


Supplies


Clipart:


Follow Me
  • Black Twitter Icon
  • Black Facebook Icon
  • Black Instagram Icon
  • Black Pinterest Icon
  • Black YouTube Icon
Meet Jenni
I Love bright colors, cute critters and creating fun handmade projects.

© 2023 by DO IT YOURSELF. Proudly created with Wix.com

bottom of page