top of page
Search
  • Writer: Jenni
    Jenni
  • Jun 15, 2020
  • 2 min read

ree

Happy Monday!


I'm starting off the week as part of Jaime's Pup in a Cup YouTube Inspiration Hop! I am so excited to be included in this video hop for Not 2 Shabby.


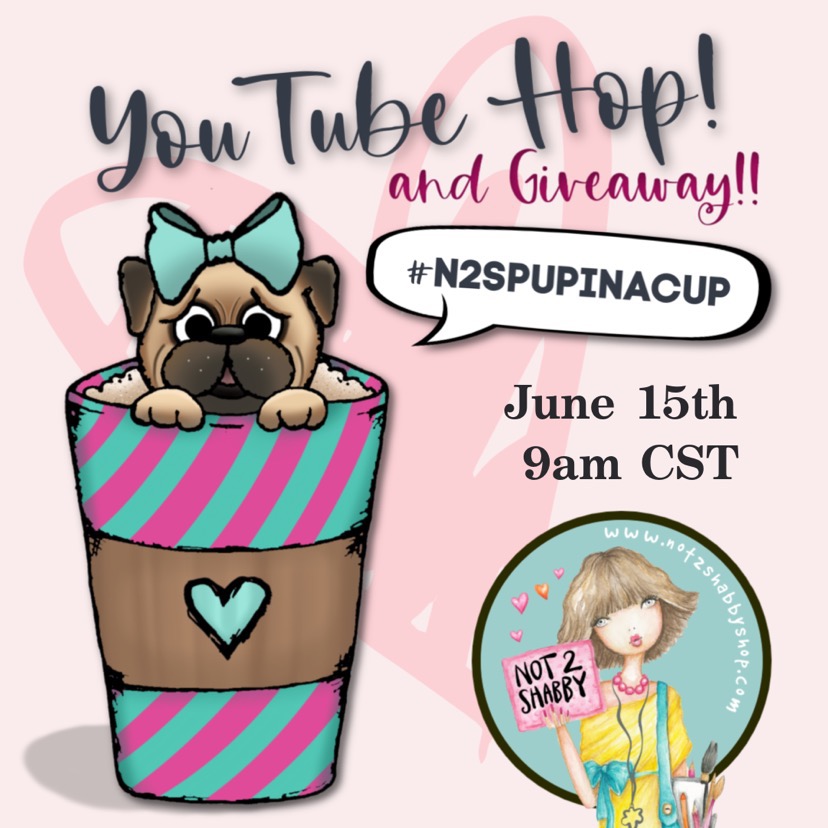
For this hop, everyone used the newest release in the Not 2 Shabby line, Pup in a Cup. I started by stamping out my images onto a piece of Strathmore watercolor paper with Gina K. black amalgam ink.


I used Karin brushmarkers to color in the image. I found the easiest way for me, is to scribble them onto a palette and pick up the colors with a paintbrush.


Once I had the images colored in, I used an embossing stylus and black and white acrylic paint to dot in some detail. Then I fussy cut the images and lined the edges with a tuxedo black Memento marker.


I set aside the images and started on the flower embellishments. I have always loved the look of rolled flowers, but this was my first time making one. I used a Lori Whitlock cutfile with my Cricut to cut out the patterns. I held one end with my reverse tweezers and rolled it up. Once I got to the opposite end, I added a nice dab of hot glue to hold it together.


After all three flowers were assembled, I added picked raspberry distress oxide to the edges of the flowers and forest moss distress oxide to the leaves.


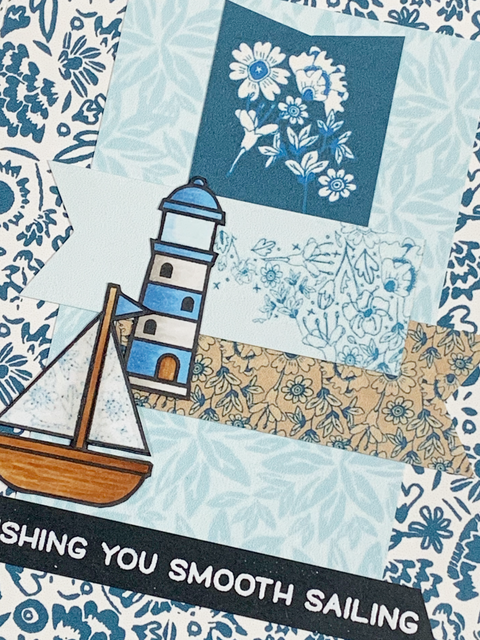
For this card, I decided to finally try out my slimline dies from Trinity stamps. I cut two pieces of patterned card stock with the stitched scalloped rectangle die as well as a light yellow card stock piece. I was going for a shabby chic, vintage look so I ended up going with a floral pattern from my stash. It was from a Recollections paper pad from Michaels called English Rose Garden.


I laid out all the pieces on the card front and then made a card base from a piece of cream colored card stock. I also brushed the tops of the flowers with unicorn stickles and then glued everything in place.


For the sentiment, I diecut letters to spell the word PUGS from a piece of pink card stock, using the Charlie Alpha die from Hello Bluebird. I inked on some more of the picked raspberry distress oxide; darker at the bottom getting lighter towards the top.


I sandwiched the word PUGS in between two more sentiments from the set that I heat embossed with white detail embossing powder onto black card stock. The final sentiment reading 'Sending you...PUGS & Coffee.'


After I glued that down, I added some adhesive backed pearls and that finished the card.


ree

ree

It was so much fun to be part of this hop! :)


Also, you can be entered for a chance to win a $25 gift card to Jaime's shop by following along and commenting under each of the videos. The winner will be announced on June 25 on the Not 2 Shabby YouTube channel.


You can use code N2S10 for a 10% discount and free shipping at $35 at the Not 2 Shabby shop.


Thank you so much for stopping by!


-Jenni :)


Supplies

Stamps:


Flowers:


Dies:


Embellishments:


Distress Oxide:


Brushmarkers:


  • Writer: Jenni
    Jenni
  • Jun 12, 2020
  • 2 min read

ree

Happy Friday!


Today I am sharing my latest design team project; a collection of cards I created during an online crop in the Thoughtfully FB group. We crafted along using the newest paper collection from Thoughtful Studio, Toile Away, Tessa.


I have a lot of people on my mind as of late and I wanted to let them know I'm thinking of them. 💙


I hoped the calming blues of this paper collection paired with some adorable stamps, might add a little sunshine to someone's day, which inspired me to create this set of thinking of you cards.


ree

To start, I stamped out images from the Lawn Fawn set Smooth Sailing. I used Gina K. black amalgam ink and 80 lb. Neenah card stock. I took my color inspiration from the sheet of ephemera that comes with the kit and used Copic markers to color in the images.

ree

I used the sailboat stamps to restamp the sails onto different bits of patterned paper, which I fussy cut and paper pieced onto the boats. Finally, I fussy cut the rest of the images and trimmed down the ephemera.


I went along all the edges of the colored images with a Memento tuxedo black marker and started putting together the card fronts.


I chose a pattern for each card and layered on bits and pieces of ephemera. I rounded the corners and added fishtails to some of the pieces and used stitched and scalloped rectangle dies on the main panels.


I heat embossed sentiments from Smooth Sailing and Lawn Fawn's Happy Happy Happy onto black card stock and trimmed them down.


Then I added different blue card stock layers onto some of the panels and laid out the images and sentiments before gluing everything together.


Once everything was in place, I added each of the panels to a 110 lb. A2 white card base. For the final step, I embellished two of the card fronts with adhesive backed pearls.


I think the theme of strength, hope, and friendship is a good one to share, especially now, and I hope that comes across in these cards. 💙


You can find more creations from me and the rest of the Thoughtful Story Team on Instagram and Facebook @thoughtfulstudio, as well as following the hashtags #madewiththoughtful and #thoughtfulstoryteam .


And of course, you can get these wonderful patterned papers here: https://www.etsy.com/shop/shopthoughtfulstudio

You can also use coupon code THOUGHTFULJENNI for 15% off!


Thank you so much for stopping by!


Wishing you a relaxing weekend,


-Jenni :)


Supplies

Stamps:


Embossing Powder:


Glue:


  • Writer: Jenni
    Jenni
  • Jun 4, 2020
  • 2 min read

ree

Hello,


I have been sending and swapping a lot of happy mail lately and it's been so nice connecting with some awesome crafty people. I like to include a card in with my packages, so I thought making up some mini cards would be a lot of fun!


I also thought it would be a good way to put a lot of my precolored images and scrap papers to use.


To start, I pulled out this Sassy Kiki image from The Sassy Club that I colored up during the Daily Marker 30 day with some Copic markers. She was the perfect image, already holding a little envelope! 😄


I also had a heat embossed 'happy' from Lawn Fawn's Mice on Ice leftover from last Christmas, which also happened to match the color scheme.


Before assembling the card, the only piece I really had to add was the little heat embossed 'MAIL' sentiment. I used the MAIL stamp from Lawn Fawn's Happy Happy Happy set with white detail embossing powder on a scrap of black card stock. After I melted it with my heat tool, I trimmed it down pretty tiny.


I found the same dark red card stock I had used for the 'happy' and trimmed down an A2 panel. I used a scrap of patterned card stock from the Toile Away, Tessa paper collection from Thoughtful Studio to layer on top.


Once I had all my pieces assembled on the card front, I glued everything down with Tombow Mono liquid glue and a Zig glue pen.


I thought about leaving the card A2 sized, but thought folding it in half and making a mini card would be so cute! I also don't usually make cards with colored card bases, so that was a cool change as well.


This was a fun and quick little card to make. By changing up the colors and using scraps and precolored images, I can have a stack of cute little happy mail cards in no time! 😁


Thanks so much for stopping by!

-Jenni :)

ree

In my initial giveaway post on May 28, I stated I would choose a winner in this weeks YouTube video. However, I have decided to extend the giveaway to Monday, June 8, 2020!


I wanted to add another item as well as give more opportunities to enter. So, as stated in the original post, all you have to do to enter is leave a comment on my last YouTube video and/or the giveaway post on Instagram.


For additional entries, feel free to follow myself and @thoughtfulstudio on Instagram and tag any crafty friends who might be interested on the giveaway post as well. 😄


The new item is a custom tshirt using elements from the Embrace Joy with Tessa paper collection!


Supplies


Paper:


Stamps:


Follow Me
  • Black Twitter Icon
  • Black Facebook Icon
  • Black Instagram Icon
  • Black Pinterest Icon
  • Black YouTube Icon
Meet Jenni
I Love bright colors, cute critters and creating fun handmade projects.

© 2023 by DO IT YOURSELF. Proudly created with Wix.com

bottom of page