
Ballerina Spinner Card - Kinda Cute Digi
- Jenni

- Jun 23, 2020
- 2 min read

Hello,
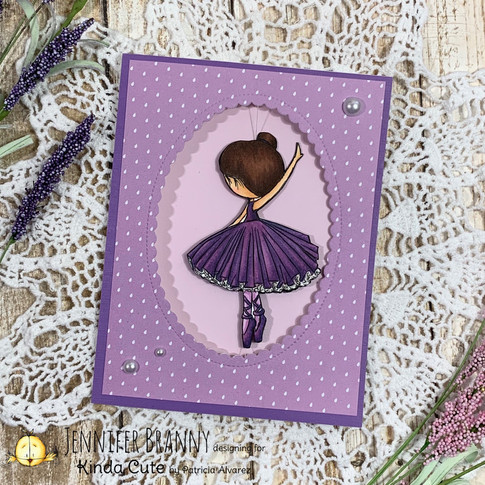
Today I’m sharing my first design team project for Kinda Cute digital stamps by Patricia Alvarez.
For this project, I used her ballerina digi to create this fun spinner card. I started by opening the stamp in Procreate on my iPad and duplicating the image.
Then I whited out the face and hair on one of the images and flipped it horizontally to get the back side of what would be the spinning ballerina.

I sized the images to approximately 2 1/4" x 3 1/2" and printed them onto a sheet of 80 lb. Neenah card stock. For the backside of the ballerina, I used a Micron pen to draw in a line for the hair, then I colored them in using a few Copic marker combos listed here:
outfit: V15, V17, BV17
tutu ruffles: W1, W3
tights: V01, V12
hair: E25, E27, E59
skin: E50, E51, E21
blush: R20
Once I had my images colored, I fussy cut them out and went along the edges with a tuxedo black Memento marker.
I laid the images colored side down and added double sided tape across the backs. I cut a long piece of white thread and placed it vertically down the center. Before I sandwiched the two images together, I added a little bit of Tombow Mono liquid adhesive.
From there, I took a piece of 110 lb. white card stock and made a regular A2 sized card base and left if unfolded. I also made two A2 panels using a sheet of textured purple card stock and a patterned purple cardstock.
I lined up all the pieces, including the card base, and used a scalloped oval die from Mama Elephant, to cut an opening into the front of the card.
To attach the ballerina, I started by gluing the dark purple card stock to the card base. Then I added double sided tape to the top and bottom of the oval opening and stretched the thread across at each end. I added another piece of tape on top of the thread and cut away the excess, leaving a tiny bit at the ends, which I folded over onto the tape.
I trimmed down the patterned purple card stock to 4" x 5 1/4" and layered it on top of the dark purple piece. I also cut a panel of light purple card stock to 4" x 5 1/4" and glued it inside the card base, behind the opening.
For the last step, I used a few adhesive backed pearls to embellish the front.


You can find the ballerina digi I used here:
or here:
Thank you so much for stopping by!
-Jenni :)
Supplies
Dies
Oval Scalloped Frams: https://mamaelephant.com/products/oval-scallop-frames-creative-cuts?_pos=1&_sid=acff850bc&_ss=r
Paper
Embellishments


Comments